Around 5 years ago (April 2015) Microsoft announced Exchange Online Advanced Threat Protection (ATP), which was renamed to Office 365 Advanced Threat Protection around a year later.
By using Office 365 Advanced Threat Protection you can add additional protection to the email filtering service available in Office 365 called Exchange Online Protection (EOP).
In this article, I will explain the functionality of Office 365 Advanced Threat Protection, and I will share the lessons learned while implementing the solution at several of my customers. I’ll also try to include as much references to other articles or blogposts as possible hopefully providing you with enough information for you to start implementing Office 365 ATP as well.
This article covers the following topics:
- What is Office 365 Advanced Threat Protection?
- Licensing
- ATP Safe Attachments
- ATP Safe Links
- ATP Anti Phishing
- Other ATP functionality
- Troubleshooting
- Implementation planning
- Conclusion
- References
Disclaimer: This post reflects the status of Office 365 Advanced Threat Protection as of April 28 2020. Functionality may change, even right after this post has been published.
What is Office 365 Advanced Threat Protection?
From the Microsoft website: “Microsoft Office 365 Advanced Threat Protection (ATP) is a cloud-based email filtering service that helps protect your organization against unknown malware and viruses by providing robust zero-day protection, and includes features to safeguard your organization from harmful links in real time.“
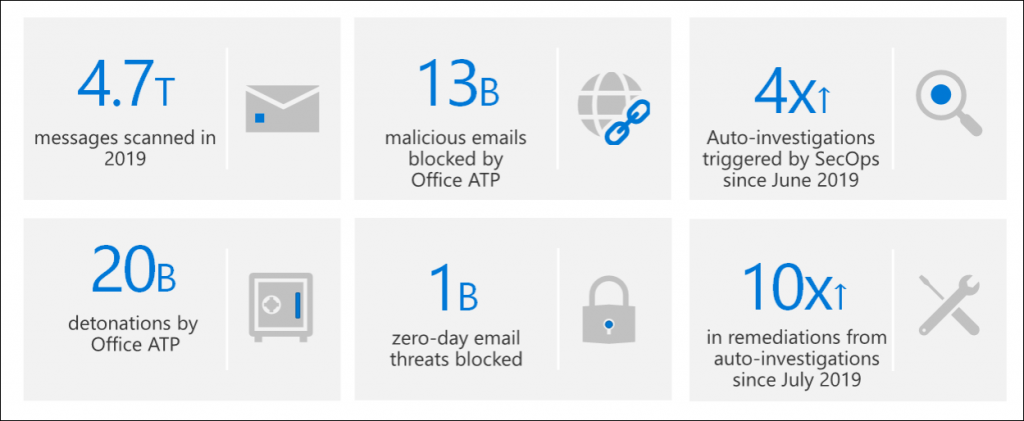
Microsoft is running this on a very large scale worldwide, to give you an idea have a look at the figure below on the amount of protected, detected and responded items we are talking about.
Besides Office 365 ATP there are also other ATP products provided by Microsoft:
All of these products share information with each other using the Microsoft Intelligent Security Graph. By doing so, optimal integration is achieved allowing different applications connected to this Security Graph to share information with each other. If you want to know more about this Intelligent Security Graph I suggest reading the following article by Maarten Goet: “What is this Microsoft Intelligent Security Graph everybody is talking about?“
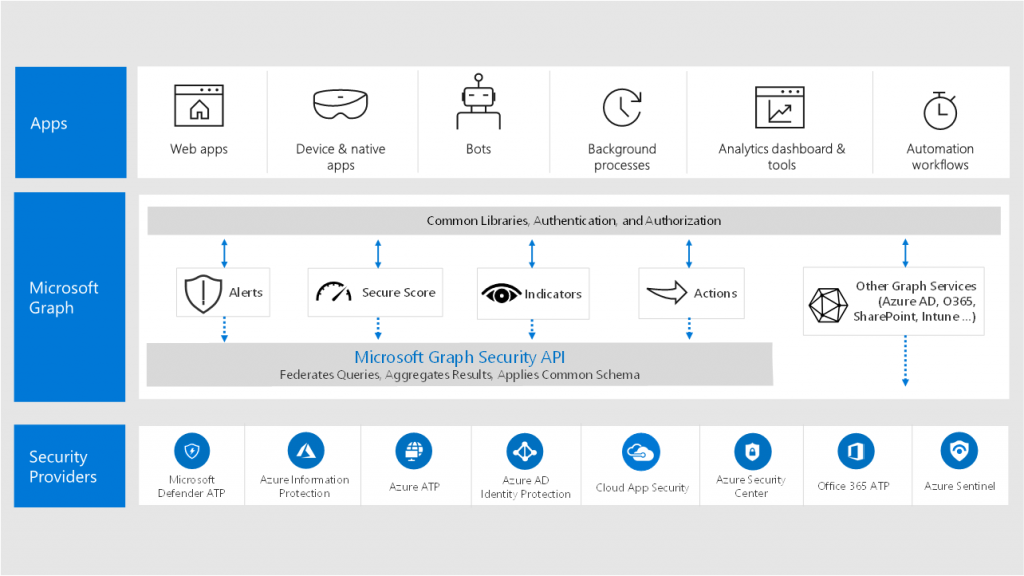
Example: An email with a malicious attachment is scanned with Office 365 ATP Safe Attachments, if the attachment if classified as malicious, that information is shared with the Security Graph and can then be used by Microsoft Defender ATP to block that same file residing on a Windows 10 client from being executed.
From an email message flow point of view, Office 365 ATP is part of the Exchange Online Protection (EOP) security measures already in place. EOP provides the Connection Filtering, Malware Scanning, Mail Flow Rules and Spam Filtering functionality. This is actually important to realize, since having a not well thought off EOP protection can have consequences on the effectiveness of ATP.

So in order to perform a good implementation of Office 365 ATP you need to have a well thought implementation of Exchange Online Protection as well.
Luckily Microsoft has created some very good documentation on where to start, with the document titled: “Best practices for configuring EOP and ATP” which outlines, some of the best practices you need to start implementing. One of these best practices is to implement DKIM and DMARC on which I blogged earlier in this article: “Did you already enable DKIM and DMARC for your Office 365 domains?”.
Based on the best practices Microsoft also provides documentation titled: “Recommended settings for EOP and Office 365 ATP security“. When implementing these settings you either have the option to go for a “Standard” or “Strict” security level. I suggest to start with aligning your environment with the Standard settings, and decide to evolve to Strict if necessary from there.
Assess your environment using ORCA
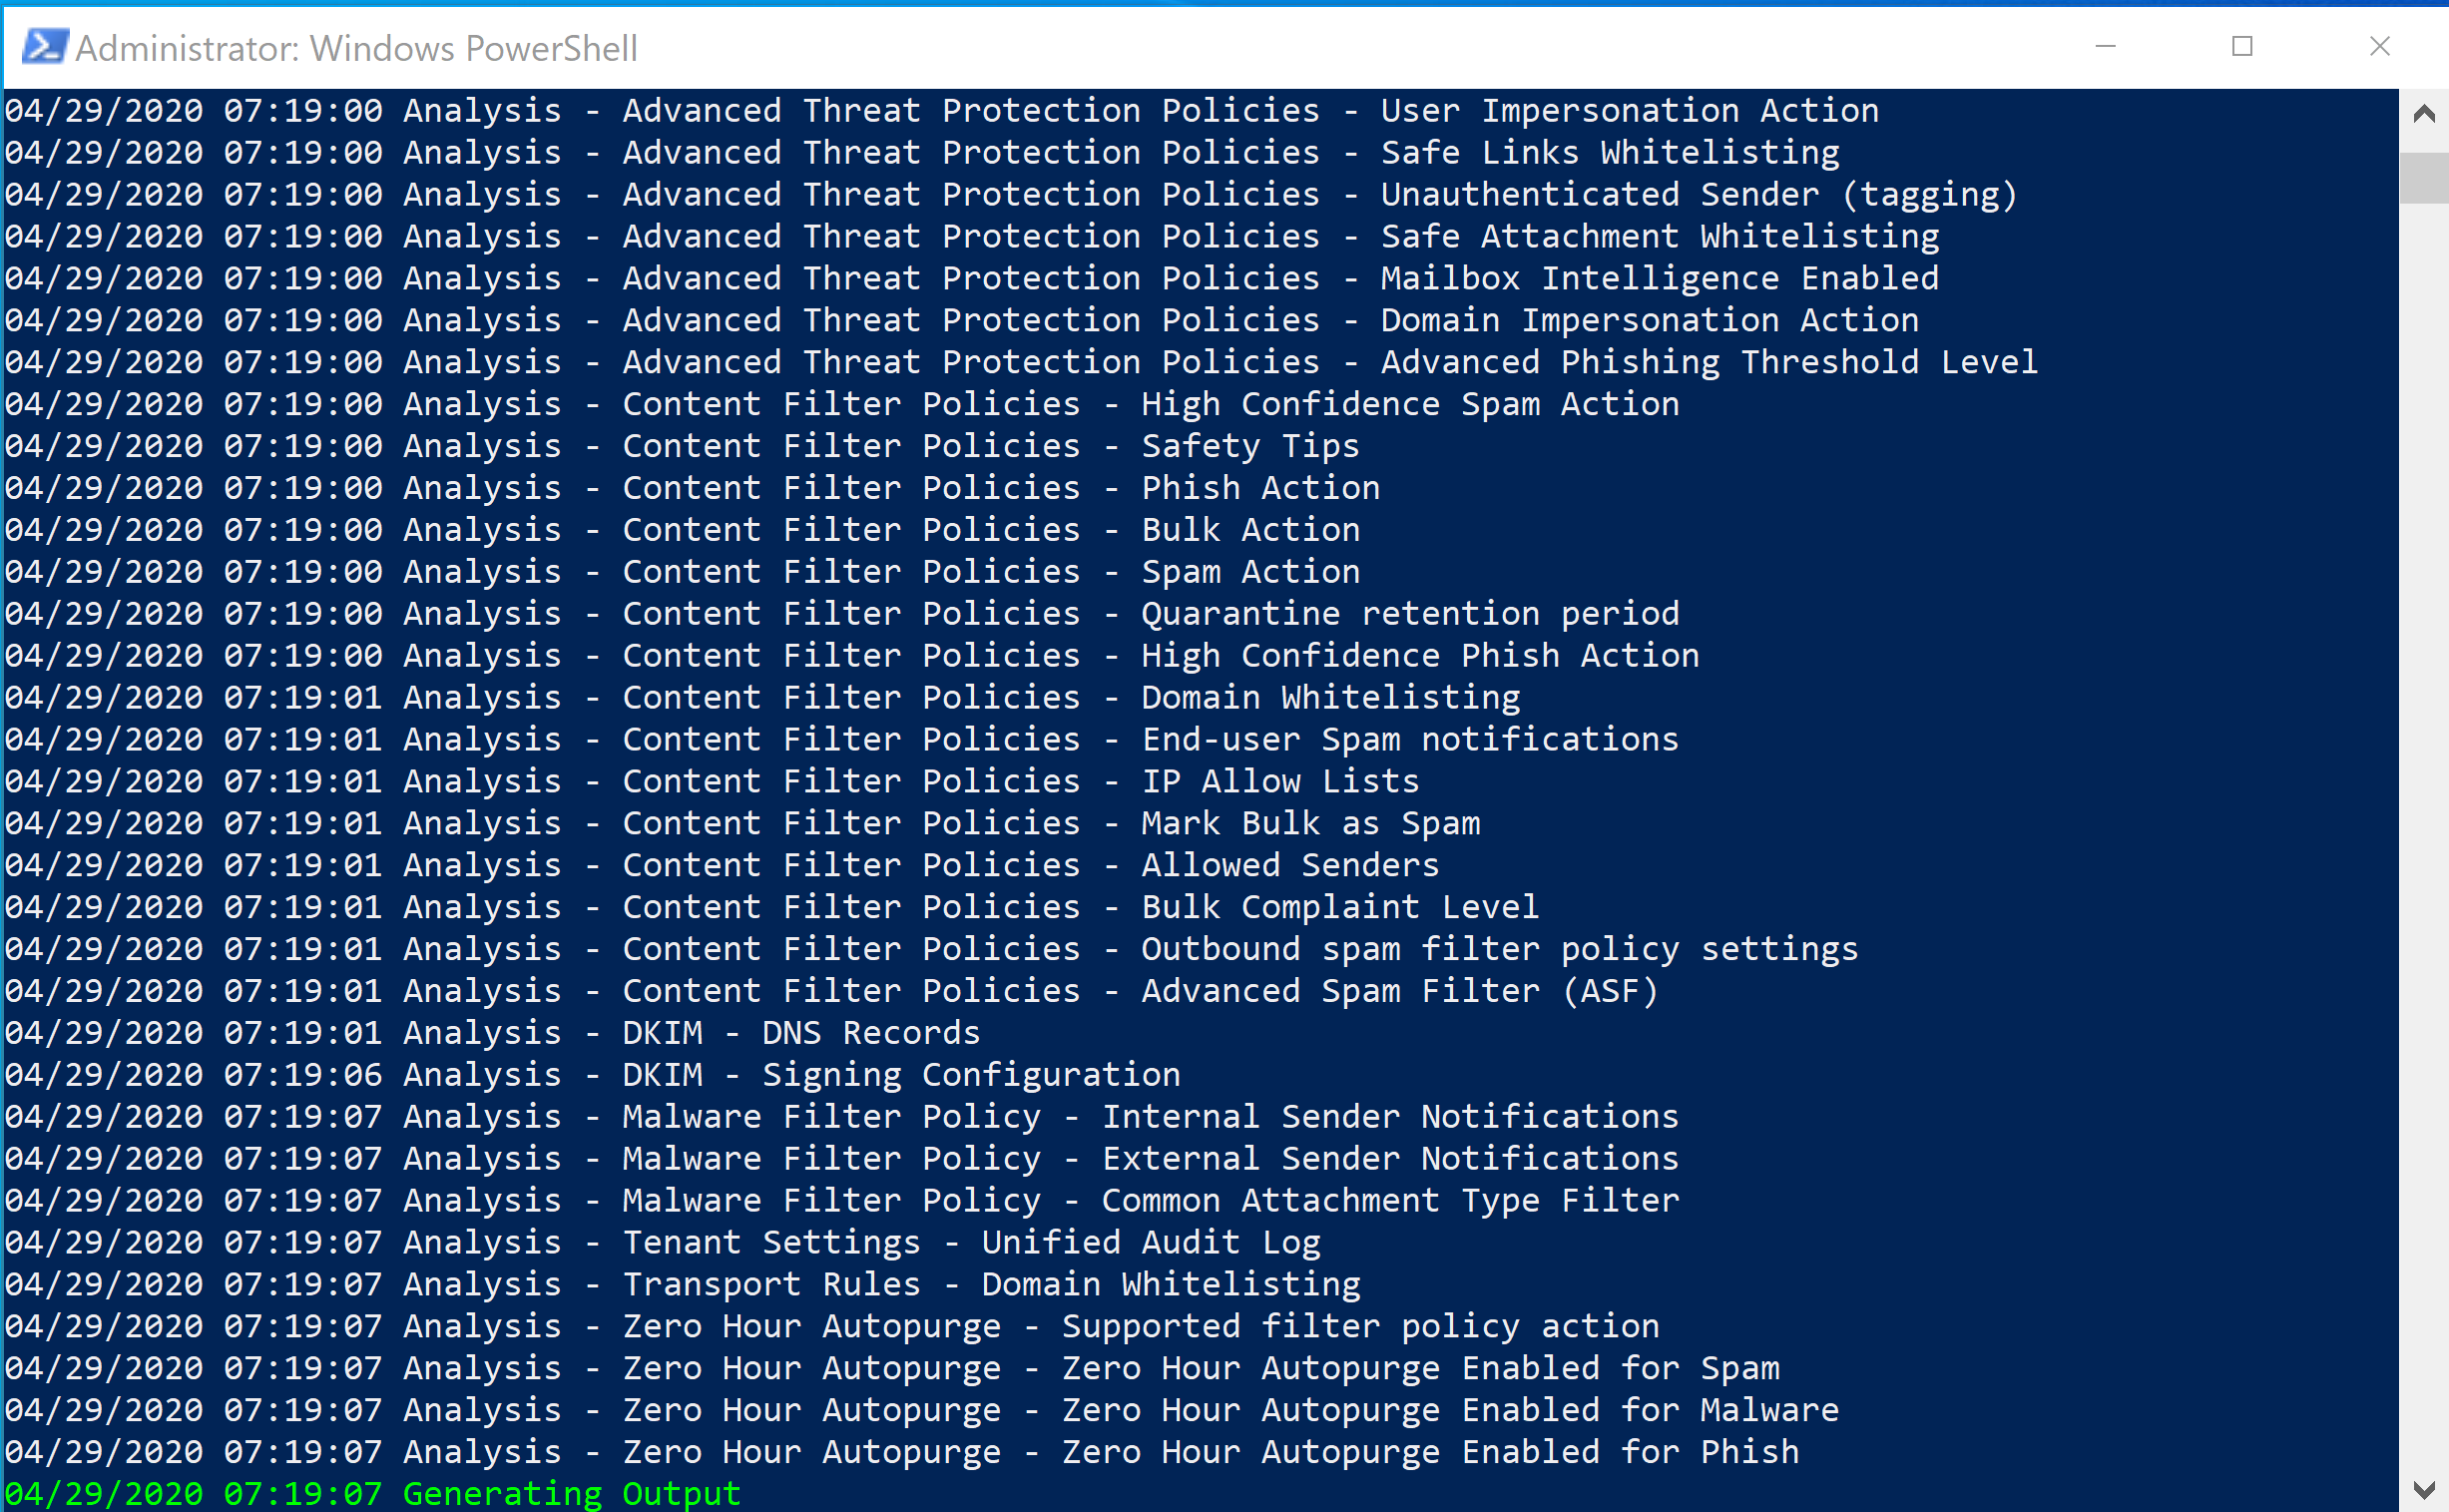
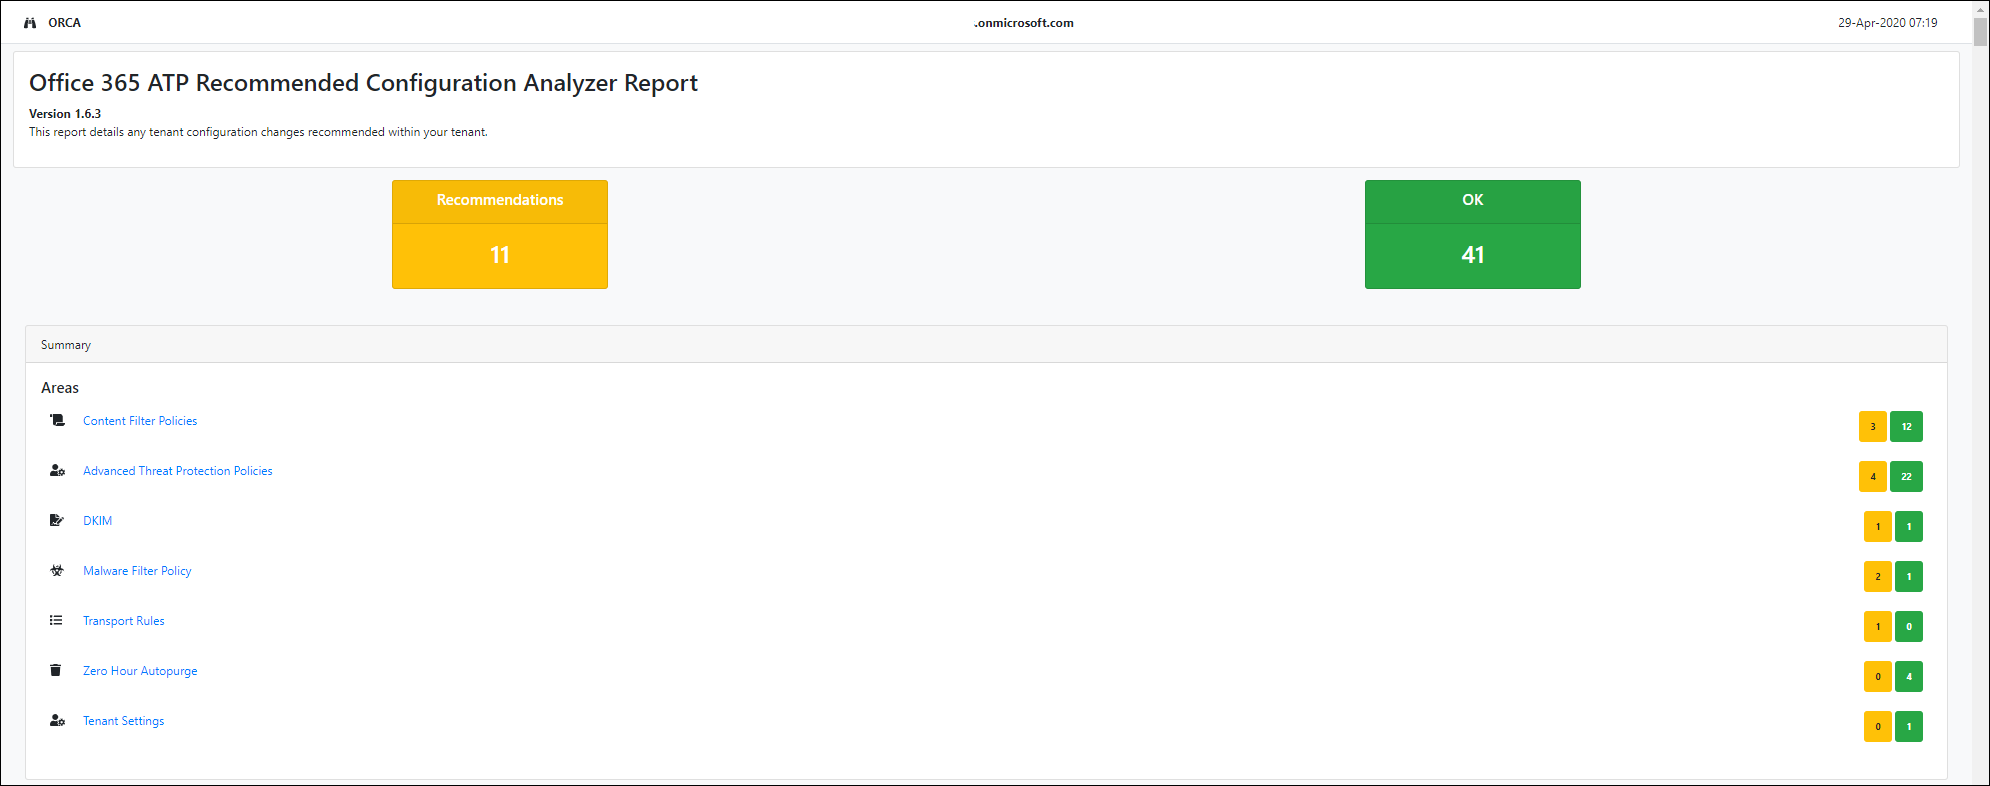
Microsoft provides a PowerShell Module called the Office 365 Advanced Threat Protection Recommended Configuration Analyzer (ORCA) which can help you assess the current settings within your environment. You can install the Module from the PowerShell Gallery using PowerShellGet using the following command: “Install-Module -Name ORCA“
Once installed you can run ORCA using the “Get-OrcaReport” commandlet.
Licensing
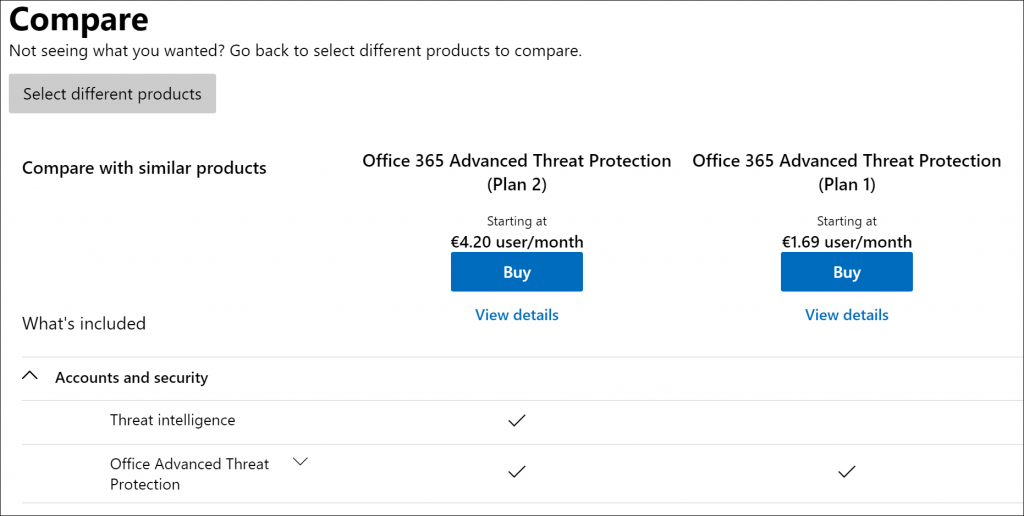
Office 365 ATP can be licensed in two different plans, Plan 1 and Plan 2. If you have licensed a Office 365/Microsoft 365 x5 plan, you automatically have ATP Plan 2 at your disposal. Microsoft 365 Business Premium includes Plan 1. You can also buy either ATP Plan 1 or Plan 2 as an addon on top of several other offered product licenses as detailed here.
For a complete overview of the differences between Plan 1 and Plan 2, Microsoft provides a PDF for download explaining the differences.
Office 365 ATP includes the following functionality:
- ATP Safe Attachments
- ATP Safe Links
- ATP Anti-Phishing
- Real Time Reports
- Threat Trackers
- Threat Investigation
- Automatic Incident response
- Attack Simulator
In the remaining of this blogpost I will go into more detail on this functionality, and share my lessons learned.
ATP Safe Attachments
If you enabled ATP Safe Attachments, email containing attachments will be scanned for malicious content. It routes all messages and attachments that do not have a virus/malware signature to a special environment, and then uses machine learning and analysis techniques to detect malicious intent. Basically, Microsoft quickly spins on a Virtual Machine and executes the content carefully watching for suspicious activity.
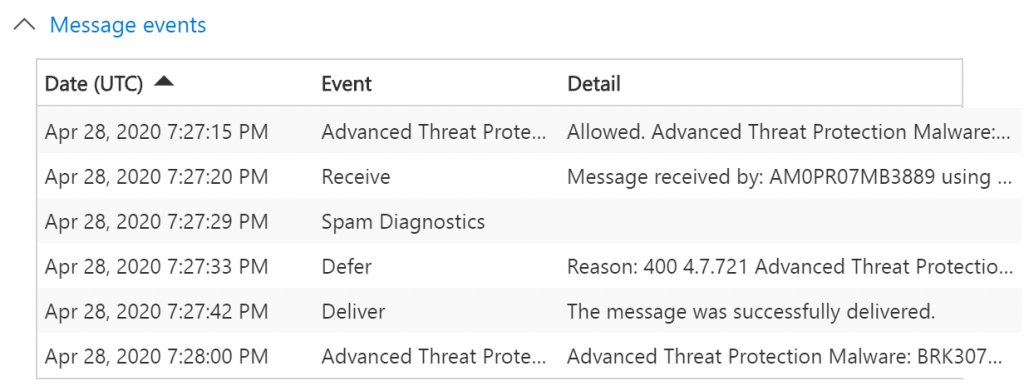
Doing this has a penalty, in the Message events example above, 9 seconds the time between Defer and Deliver. You can expect that email will be slightly delayed because of the scanning taking place. Microsoft doesn’t give any details on how long this scanning takes place, when searching the internet you will find different outcomes, from people having no issues at all, to people complaining that it can take up to 30 minutes. My experience so far is that emails are delayed for minutes maximum, I personally haven’t experienced any bigger delays, even today with all the resource issues due to COVID19.
Within the ATP Safe Attachments policy you have the option to define how you want the policy to behave. The Microsoft recommended setting is Block, which blocks emails with detected malware and won’t deliver these kinds of emails to the inbox of the user.
ATP Safe Attachments also provides the option to protect files in SharePoint, OneDrive and Microsoft Teams. If enabled, when a file in any SharePoint, OneDrive, or Microsoft Teams library gets identified as malicious, ATP will prevent users from opening or downloading the file.

If the latency is really a big issue, you can enable the Dynamic Delivery option, where the email is delivered to the inbox directly but the attachment is withdrawn from the email while being checked for malware. Even though within our tenant this option is enabled I recommend only using this option for a select group of users when really needed, mainly because it comes with extra complexity and you have to explain to users the behavior of the policy. For example, for some file types you can already preview the contents, until the scanning has taken place after which the user can open the attachment in order to view it.
![Machine generated alternative text:
Insight24 Safe Attachments Policy
general
Safe attachments unknown malware response
settings
Select the action for unknown malware in attachments. Learn more
applied to
Warning
Monitor, Replace and Block actions may cause significant delay to email delivery.Learn more
Dynamic Delivery is only available for recipients with hosted mailboxes. Learn more
If you choose the Block, Replace or Dynamic Delivery options and malware is detected in
attachment, the message containing the attachment will be quarantined and can be released
only by an admin.
C) Off - Attachment will not be scanned for malware.
C) Monitor - Continue delivering the message after malware is detected; track
scan results.
C) Block - Block the current and future emails and attachments with detected
malware.
C) Replace - Block the attachments with detected malware, continue to deliver the
message.
@ Dynamic Delivery - Deliver the message without attachments immediately and
reattach once scan is complete.
Redirect attachment on detection
Send the blocked, monitored, or replaced attachment to an email address.
C] Enable redirect
Send the attachment to the following email address
Apply the above selection if malware scanning for attachments times out or
error occurs.](https://www.vansurksum.com/wp-content/uploads/2020/04/O365ATP-8-1024x848.png)
You can exclude specific messages from being checked by ATP Safe Links policy, by creating a transport rule which sets the X-MS-Exchange-Organization-SkipSafeAttachmentProcessing header to the value 1.
ATP Safe Links
If you enable ATP Safe Links, URLs in emails are rewritten to include https://*.safelinks.protection.outlook.com/?url= in front of the original URL. You can only see this if you copy the URL and paste it, for the end-user even when the hover over the URL in their email they will still see the original URL. Note that the wildcard * is a host name in my example, your exact URL can be different, mine is https://eur03.safelinks.protection.outlook.com/?url=.
URLs once rewritten are encoded, while troubleshooting this I found the functionality of the https://www.o365atp.com/ website quite useful, since it allows you to paste a ATP encoded URL and translate it back to the original URL.
By adding the safe links URL in front of the URL, Microsoft is capable of proxying the initial URL through their scanning service. Keep in mind that any links clicked after that do not go through this webservice. You’ll need another proxying solution if you want that functionality. ATP Safe Links also provides the option to be active in Office 365 applications, this option is enabled by default.
Setting up the ATP Safe Links policies
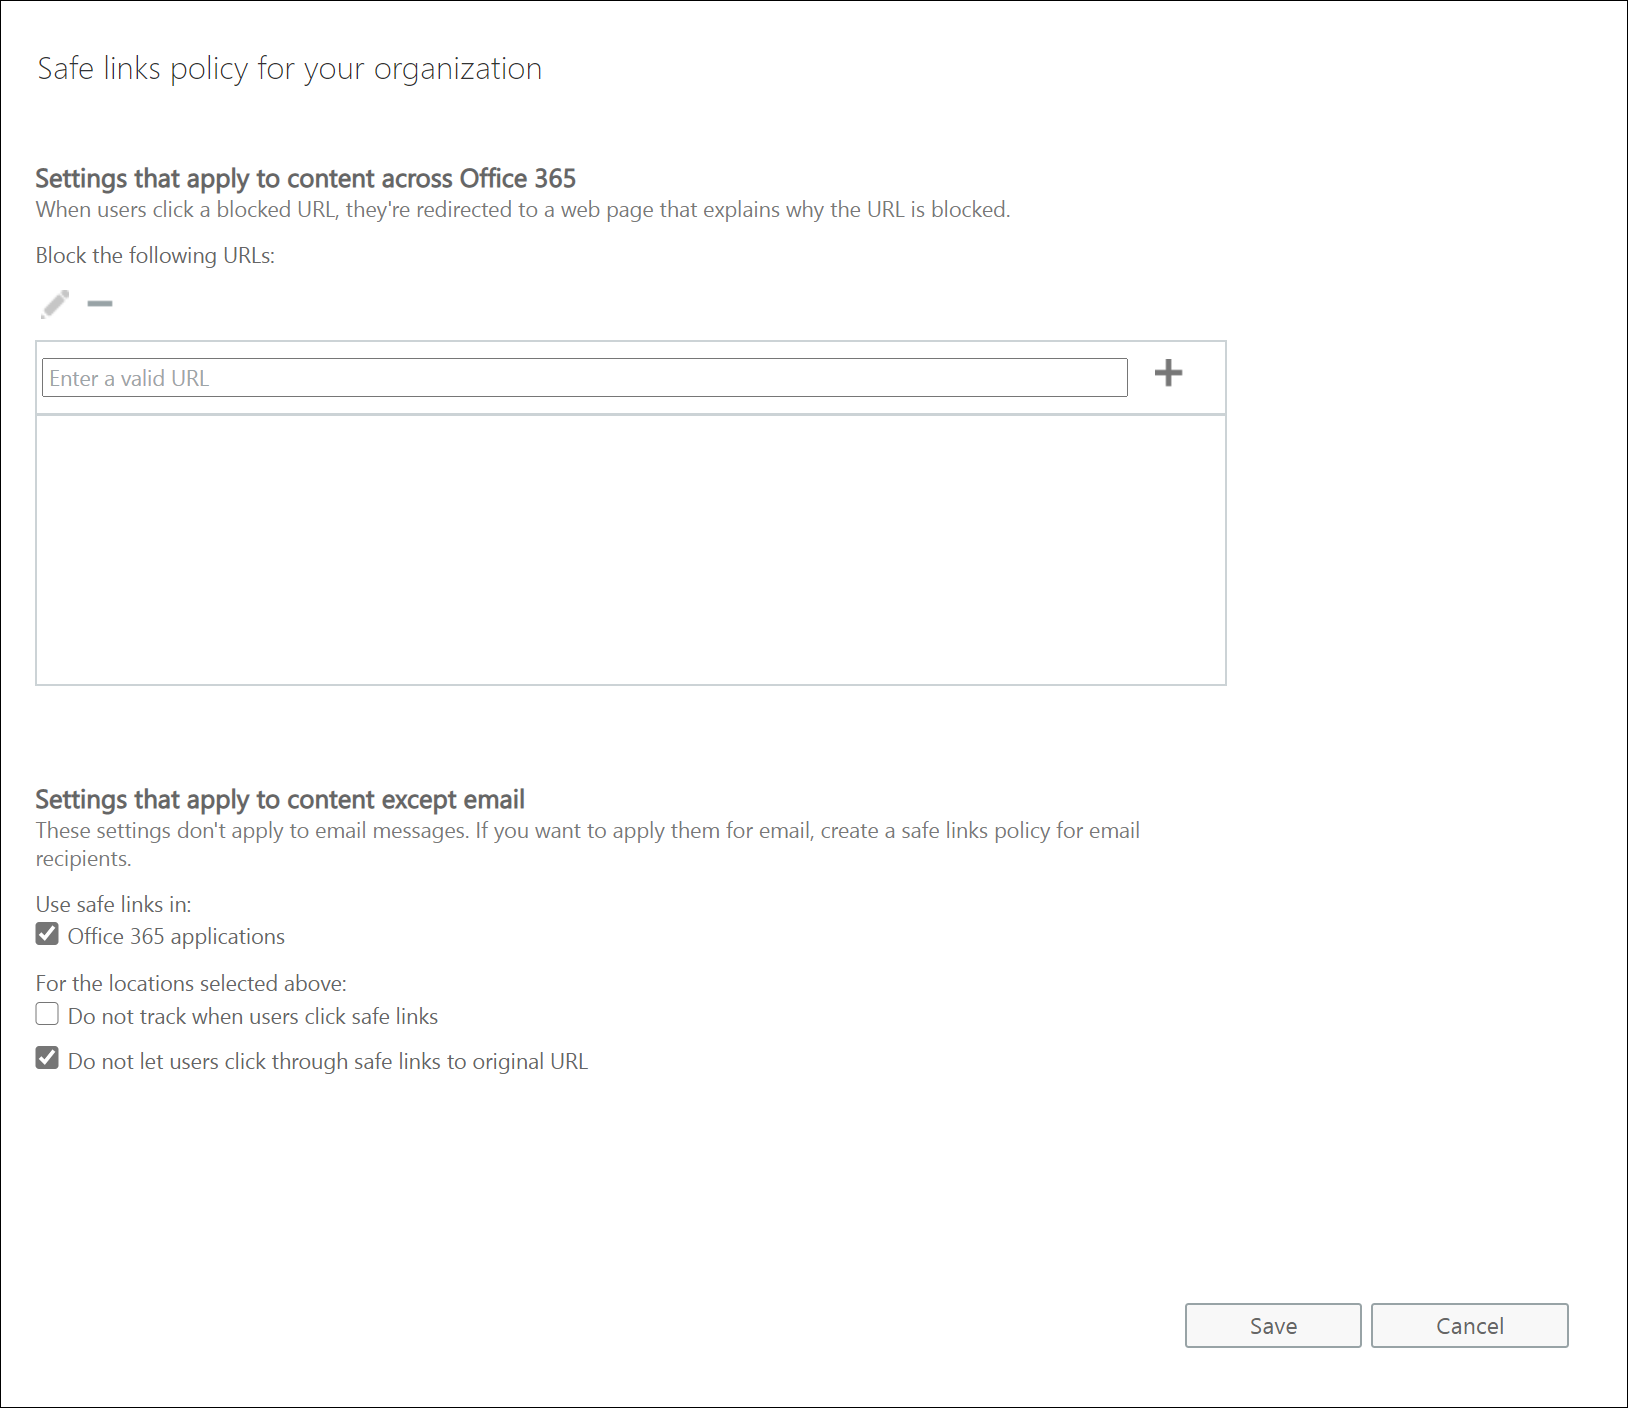
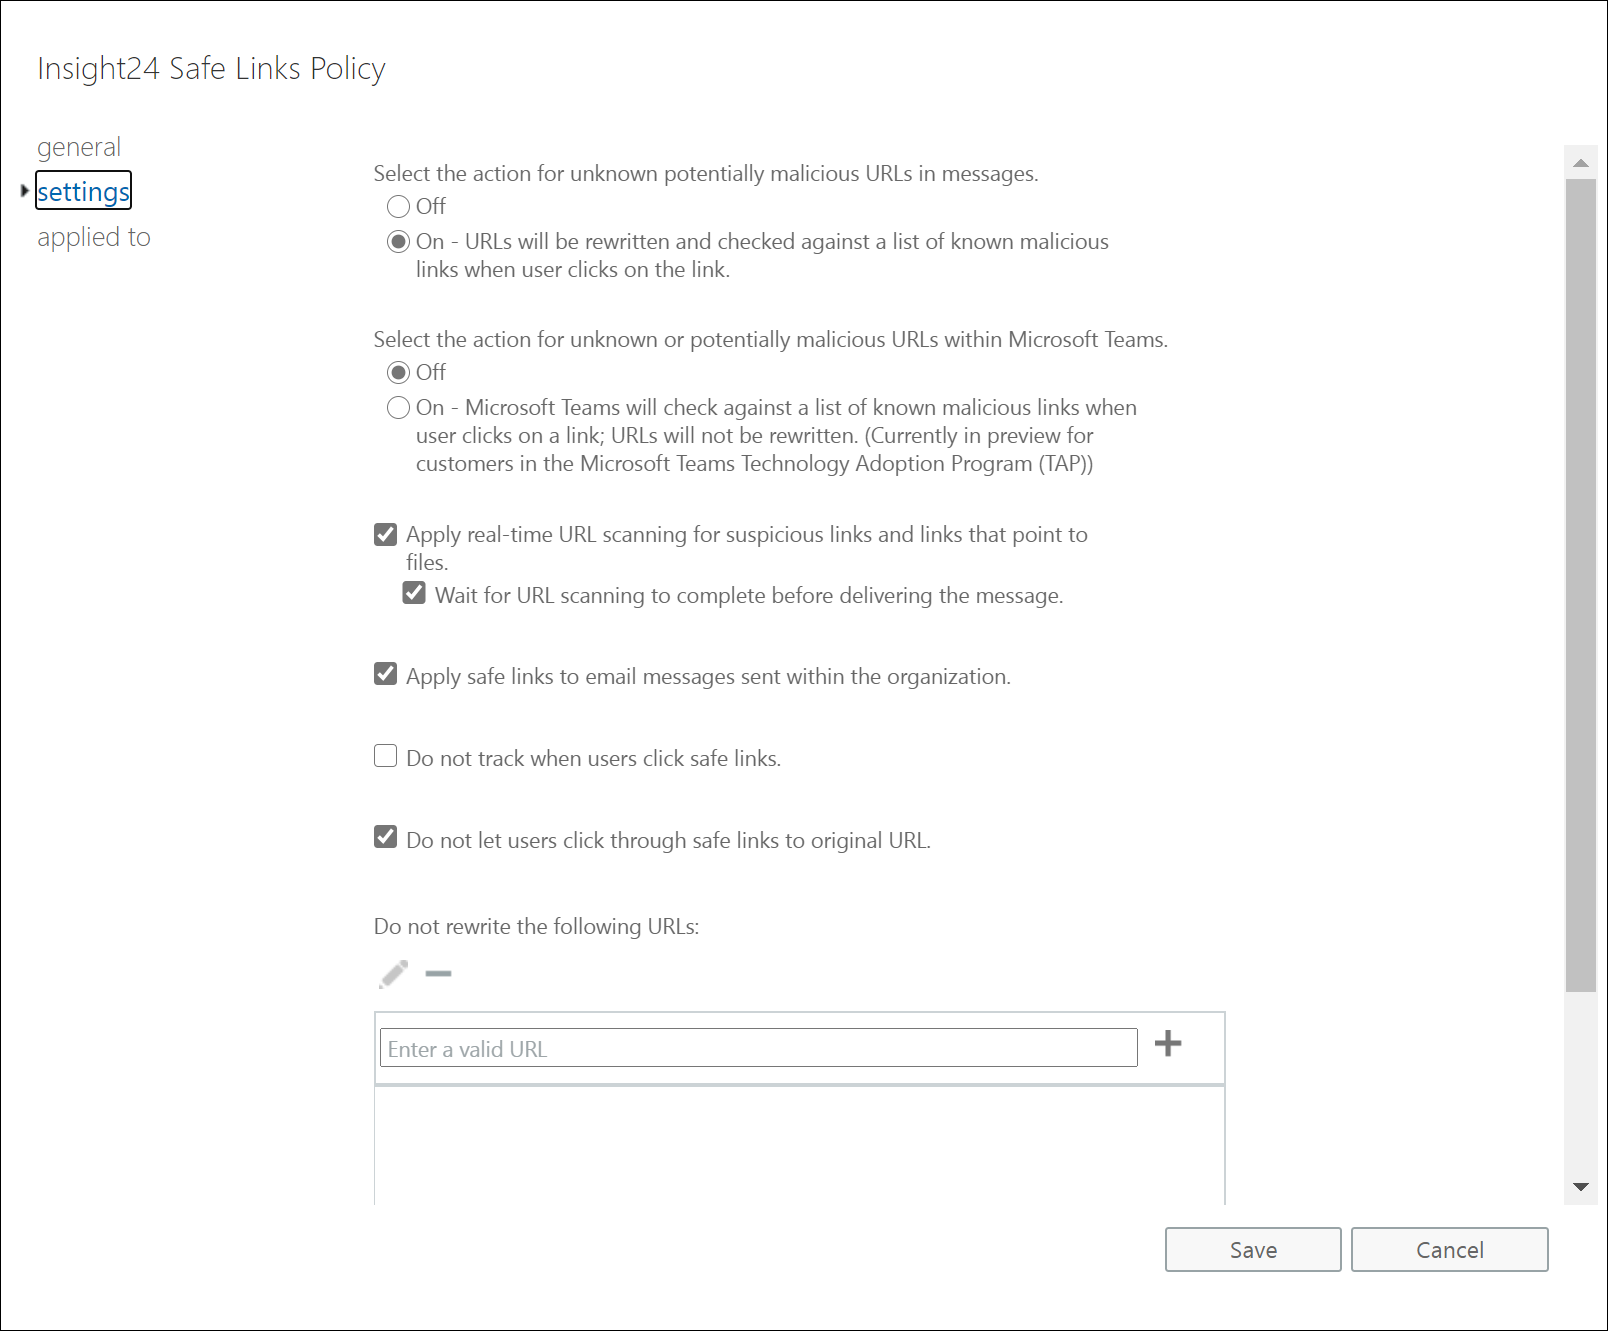
For ATP Safe Links you must set 2 policies, there is a default policy having some options, but other options are available if you create a custom policy.
You can exclude specific messages from being checked by ATP Safe Links policy, by creating a transport rule which sets the X-MS-Exchange-Organization-SkipSafeLinksProcessing header to the value 1.
Testing ATP Safe Links
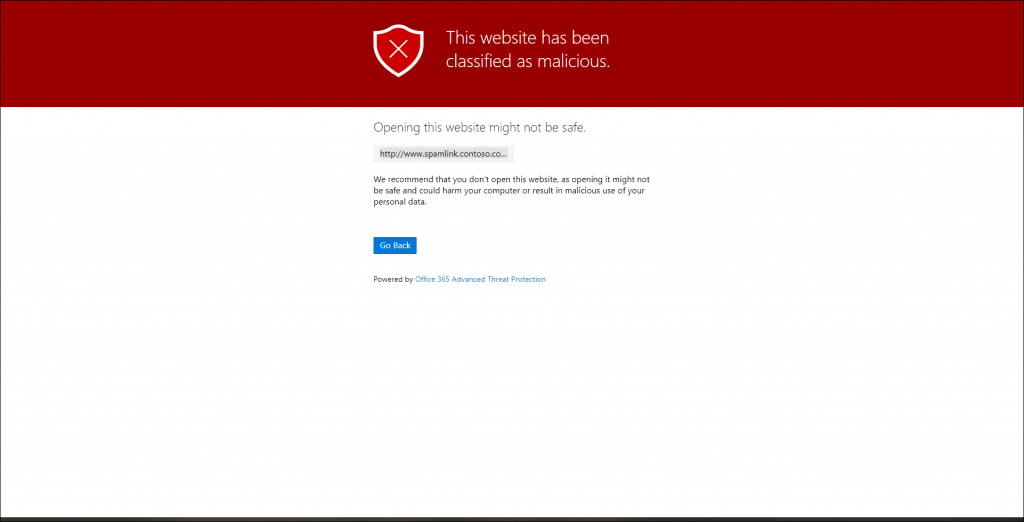
You can test whether ATP Safe Links is working by sending an email from an external email address to your account containing the following URL: http://www.spamlink.contoso.com
If you open that (rewritten) URL in your email client you should receive the following page in your browser. ATP Safe Links has several other warning pages which are described in more detail in the following document: ATP Safe Links warning pages
Be careful with long URLs
While implementing this solution at one of my customers we ran into an issue where URLs in emails, once wrapped by ATP Safe Links surpassed the 2048 (2K) length after which it got truncated by the browser causing the URL to fail. If you experience this issue you either have two options: Ask the sender to shorten the link, or add the domain to the “Do Not Rewrite” list.
Alert policies in the Security & Compliance center.
Especially with ATP Safe Links it can happen that while being delivered the URL has been found non-suspicious, if Microsoft later decides that the email was malicious after all, you can be notified. For this to work you must have the “A potential malicious URL click was detected” alert policy active. If enabled this will create an alert in the Alerts section of the Security & Compliance center allowing you to reach out to the user and verify whether or not the attacker was capable of getting credentials of the user.
ATP Anti-phishing
ATP Anti-phishing detects attempts to impersonate your users and custom domains. It applies machine learning models and advanced impersonation-detection algorithms to avert phishing attacks. ATP anti-phishing checks incoming messages for indicators that the message may be phishing. Whenever a user is covered by an ATP policy (safe attachments, safe links or anti-phishing) the incoming message is evaluated by multiple machine learning models that analyze the message to determine if the policy applies to the message and the appropriate action is taken, based on the configured policy.
Within Exchange Online Protection, incoming email is checked on having valid Sender Policy Framework (SPF), Domain Key Identified Mail (DKIM) and Domain-based Message Authentication Reporting and Conformance (DMARC) configurations. If the email is sent from an address which is not in the SPF record, or the message is not signed while signing is specified in the DMARC record. the message will most likely be considered SPAM by the anti-spam settings (SCL). ATP Anti-Phishing takes it one step further being capable of detecting spoofing messages even when EOP might find the message legitimate. See my blogpost about SPF, DKIM and DMARC for more context on this subject: Did you already enable DKIM and DMARC for your Office 365 domains?
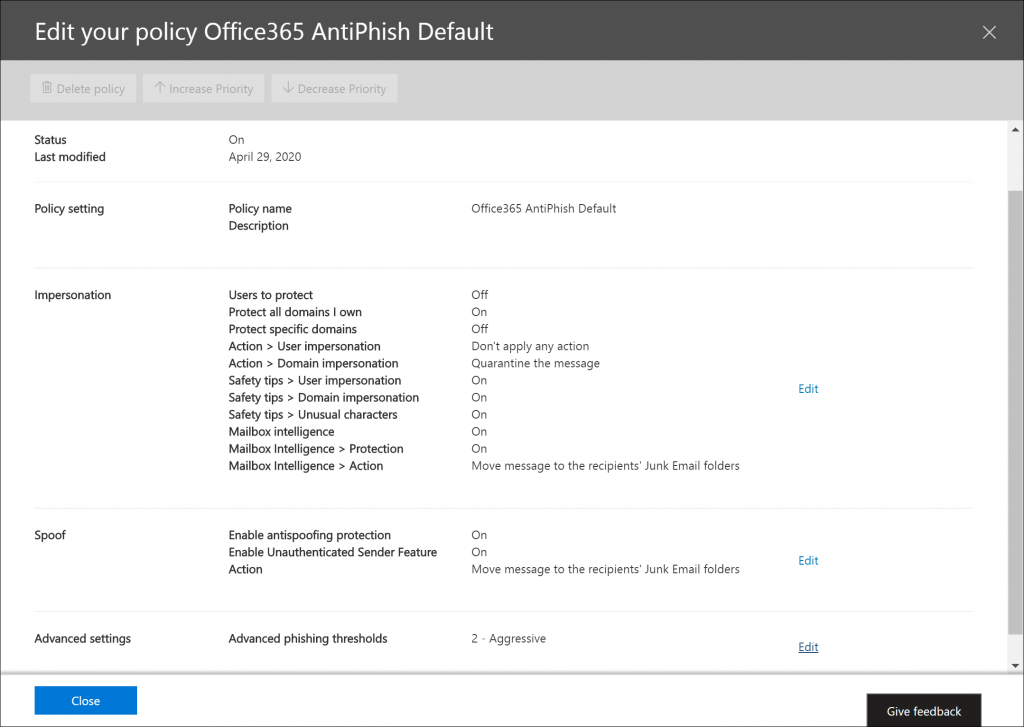
The ATP Anti-phishing has a default policy which is active for all your users and has the following options for impersonation and spoofing.
Protecting users and domains
Within the ATP Anti-phishing you have the option to include users and domains to protect. For the domains you have the options to add the domains you host using Office 365, but you can also include domains you own but do not host in Office 365 or domains of business partners.
By doing so, messages which appear to be coming from mircosoft.com or micr0soft.com for example, are flagged if you own the microsoft.com domain or added microsoft.com to the list of domains to protect. You can decide what to do with these kinds of email:
- Redirect message to other email addresses
- Move message to the recipients’ Junk Email folders
- Quarantine the message* (MS recommended option)
- Deliver the message and add other addresses to the Bcc line
- Delete the message before it’s delivered
- Don’t apply any action
During implementation we have found some interesting use cases where legitimate email was considered impersonation, for example we had a domain surkey.nl receiving email from surveymonkey.com where surveymonkey.com was considered impersonation from the perspective of ATP anti phishing. In my tenant (insight24.nl) for example we sometimes receive email from Insight, which is a business partner.
We therefore added insight.com to our trusted domain list, in order to make sure that email is delivered to the inbox instead of in our case “Quarantined”, in the case of surkey.nl you should include the exact domain used by surveymonkey.com to send the email to your organization. In this case we needed to add mailer.surveymonkey.com and go.surveymonkey.com. It’s not possible unfortunately to use wildcards when defining the trusted domain list. Also there is a maximum of 20 trusted domains.
Another interesting case is where “spoofing” emails are being sent out by Microsoft, examples are Teams and SharePoint which sent out emails on behalf of users. In order to make sure that these emails are delivered into the inbox we added the following two email addresses to the trusted senders list in the ATP anti phishing policy: noreply@email.teams.microsoft.com and no-reply@sharepointonline.com. I also requested Microsoft to deliver their recommendations (via Github feedback on the documentation page) for this but unfortunately they haven’t be able to provide this information yet.
Uservoice items addressing these limitations to vote for:
- Increase the ATP Anti-Phishing policy trusted domains limit
- Advanced Threat Protection (ATP) Whilelist – add wildcard support and/or extend the 320 character limit
Therefore my advice would be that after implementing your ATP anti phishing policy to regularly check your Quarantined items and make modifications based on Quarantined email from the AntiPhishPolicy categorized as Phish. If you want to make sure that the email was Quarantined based on the ATP anti phishing policy you can look for the CAT:DIMP property in the X-ForeFront-AntiSpam-Report header.
Within the policy you can also add a list of maximum 60 email addresses, which from that point are protected as well. Microsoft uses the sample of michelle@contoso.com being flagged, if the added email address is michele@contoso.com. Also here, be very careful when implementing this option, since based on my experience, the algorithm to detect that the domain or sender can be very enthusiastic sometimes. After implementation make sure that you regularly check your Quarantined items.
If you have systems within your organization sending out email on-behalf of, or as your users take extra care, since your domains are now protected from impersonation you have to make sure that emails sent using any of the email addresses in your domain still reach the inbox of your users.
Besides configuring the default Anti phish policy, you can also create specific ATP anti phish policies making them applicable for specific users.
Safety tips
If you decide to deliver messages flagged as impersonation to the inbox, you have the option to do so, but provide safety tips to make the user aware of this risk. The following safety tips are provided:
- Impersonated users: The From address contains a protected user.
- Impersonated domains: The From address contains a protected domain.
- Unusual characters: The From address contains unusual character sets (for example, mathematical symbols and text or a mix of uppercase and lowercase letters) in a protected sender or domain.
Note: you can enable impersonation safety tips by clicking on the “Turn on impersonation saftey tips” link on the Actions page of the policy.
Mailbox Intelligence
Mailbox intelligence analyzes your cloud-based users’ mail flow patterns to determine which contacts they communicate with most often. This helps to more easily identify when an email message might be from an attacker who’s impersonating one of those contacts. This intelligence allows Microsoft 365 to customize user impersonation detection and better handle false positives.
You can either enable Mailbox intelligence and Mailbox intelligence based impersonation protection and specify what happens with messages which are sent by an impersonated user.
Spoofing
Spoofing is when the From address in an email message (the sender address that’s show in email clients) doesn’t match the domain of the email source. Antispoofing protection is enabled by default, and its settings are also available when only having Anti-phishing policies available in the case you didn’t license ATP.

If spoofing is detected you can choose to either sent the email to Quarantine or to the recipient’s Junk Email folder. If you also enable the Unauthenticated Sender option, the user receives some visual identification in the received email message:
- A question mark (?) is added to the sender’s photo if the message does not pass SPF or DKIM checks and the message does not pass DMARC or composite authentication.
- The via tag (chris@contoso.com via michelle@fabrikam.com) is added if the domain in the From address (the message sender that’s displayed in email clients) is different from the domain in the DKIM signature or the MAIL FROM address.
See: Identify suspicious messages in Outlook.com and Outlook on the web for more information on this subject.
Advanced phishing thresholds
You have the option to specify how to treat detected phishing messages using thresholds. Microsoft recommend setting this to threshold 2 – Aggressive.The following thresholds are available:
1 – Standard: This is the default value. The severity of the action that’s taken on the message depends on the degree of confidence that the message is phishing (low, medium, high, or very high confidence).
2 – Aggressive: Messages that are identified as phishing with a high degree of confidence are treated as if they were identified with a very high degree of confidence.
3 – More aggressive: Messages that are identified as phishing with a medium or high degree of confidence are treated as if they were identified with a very high degree of confidence.
4 – Most aggressive: Messages that are identified as phishing with a low, medium, or high degree of confidence are treated as if they were identified with a very high degree of confidence.
Other ATP functionality
Besides ATP Safe Attachments, ATP Safe Links and ATP Anti Phishing, the Office 365 ATP suite provides the following other functionality.
Real-time reports
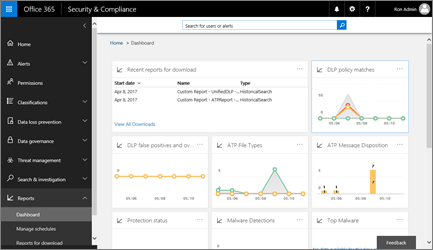
When you have licensed Office 365 ATP some extra reports are available in the Security & Compliance Center. The following ATP reports are available:
- Threat Protection Status Report
- ATP File Types report
- ATP Message Disposition report
- Real time detections (ATP Plan 1) or Explorer (ATP Plan 2)
- Email security reports (Top Senders and Recipients, Spoof Mail, Spam Detections)
You also have the ability to generate some reports using PowerShell
- ATP Safe Links URL trace, using the Get-UrlTrace cmdlet
- EOP and ATP results, using the Get-MailTrafficATPReport cmdlet
- EOP and ATP detections, using the Get-MailDetailATPReport cmdlet.
Unfortunately I haven’t found an easy way yet to get the same reporting data into PowerBI for example, for now the only options you have is to either export data to CSV and work from there, or have reports send to you via email.
Threat Trackers
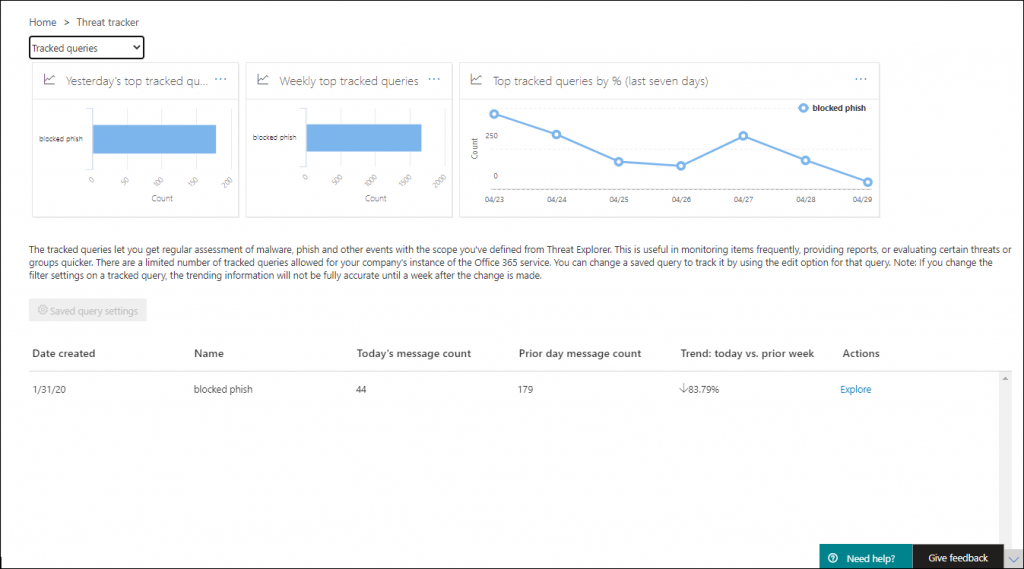
Threat Trackers are informative widgets and views that provide you with intelligence on different cybersecurity issues that might impact your company. The following views are available:
Treat Investigation
Depending on which ATP version you licensed you can either use “Real-time detections” (Plan 1) or use “Explorer” (Plan 2). You can find the differences between Real-time detections and Explorer in this downloadable PDF.
Real time detections
Real-time detections contain views, such as Malware (for email and content), Submissions, and Phish. Real-time detections is a real-time report that lets authorized users identify and analyze recent threats.
Explorer
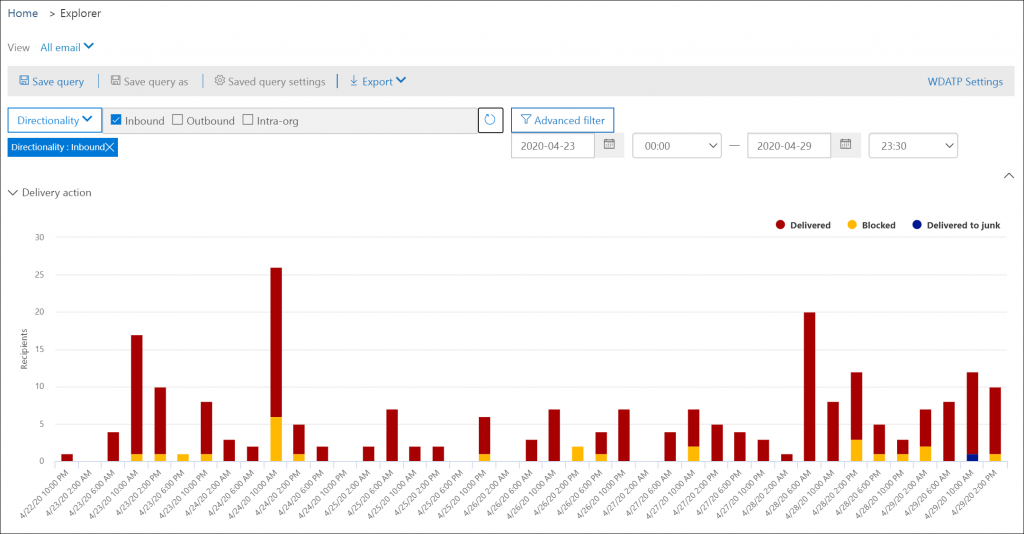
Explorer provides the functionality of Real time detections providing more filter options , for example within Explorer you can search for “All email” while in Real time detections only Malware, Submissions, Phish and Malware is available.
Automatic incident response
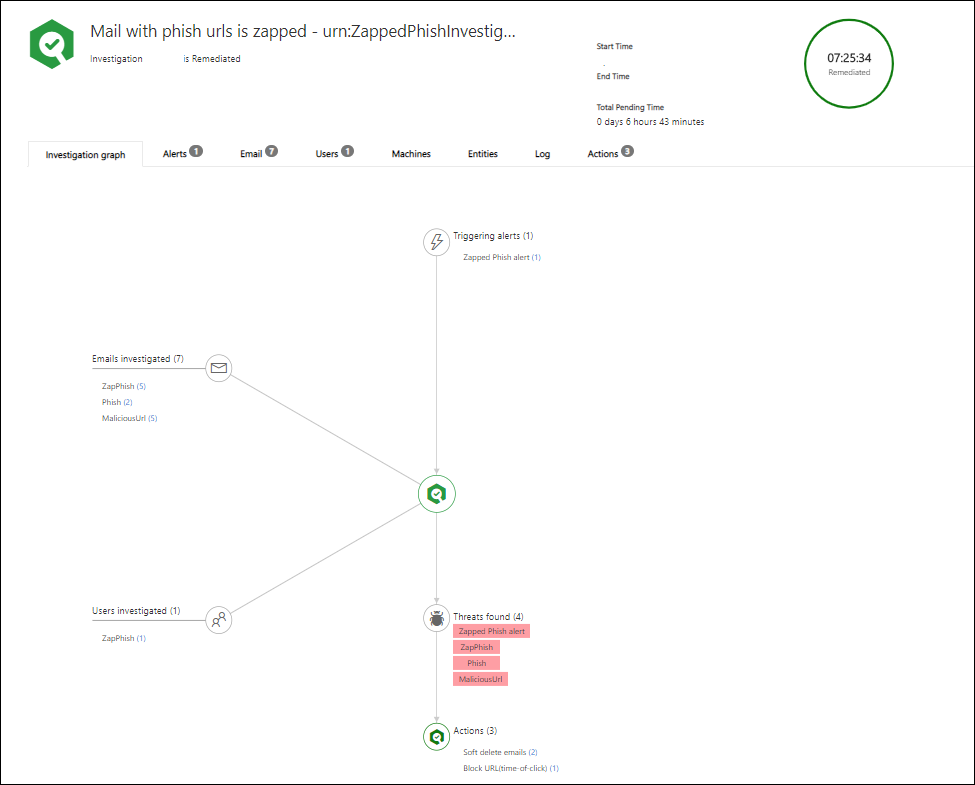
ATP Plan 2 provides Automated investigation and response (AIR) capabilities. AIR automates the investigation of incoming alerts. These automated investigations are called security playbooks.
While an automated investigation runs, it gathers additional data about the email in question and entities related to that email. Such entities can include files, URLs, and recipients.
The investigation’s scope can increase as new and related alerts are triggered. During and after an automated investigation, details and results are available to view.
Results include recommended actions that can be taken to respond and remediate any threats that were found. In addition, a playbook log is available that tracks all investigation activity. Your security operations team reviews the investigation results and recommendations, and approves or rejects remediation actions.
Attack Simulator
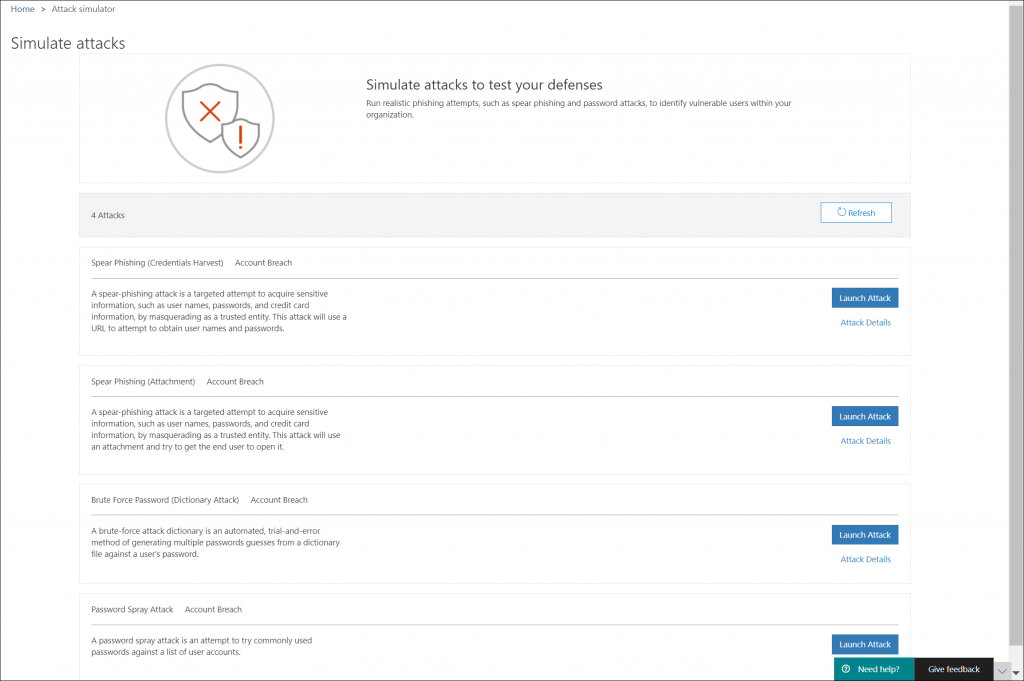
You can use Attack Simulator to run realistic attack scenarios in your organization. This can help you to identify and find vulnerable users before a real attack hits. If you want to make use of Attack Simulator, your account must have MFA enabled.
At time of writing the following attacks are available:
- Spear Phishing (Credentials Harvest)
- Spear Phishing (Attachment)
- Brute Force Password (Dictionary Attack)
- Password Spray Attack
Troubleshooting
Before you start implementing EOP and ATP make sure that you understand how you can troubleshoot email delivery issues. One of the most necessary tools for this is the Message Header Analyzer (MHA), available via: https://mha.azurewebsites.net/pages/mha.html. The MHA is capable of transforming the message header of an email into a more readable form giving you better options to troubleshoot what’s going on when email isn’t delivered as expected.
Most important in the message header is the X-Forefront-Antispam-Report header, containing all the information you need in order to determine why what happened to an email.
More information about how to read that header here: Anti-spam message headers
In my opinion the best thing you can do is to make sure that most email gets through, so don’t use Connection Filtering or Mail Flow rules to drop email at the front gate but preferably have it go through EOP and either delivered to Quarantine or the Junk Email folder of the user, or dropped afterwards (f.e. when it contains an attachment containing malware). By doing this you have the best options to retrieve false positives and not lose any email.
If email from a legitimate sender ends up in Quarantine/Junk Email this could be because the sender didn’t configure their environment yet in a decent way. First thing would be to point them on that issue of course but sometimes this isn’t possible (yet), in that case you can make exceptions, for example by defining a very specific Transport rule, or by allowing a sender to spoof.
Some more information on that:
Use spoof intelligence to configure permitted senders of unauthenticated email
Implementation planning
Implementing Exchange Online Protection and Advanced Threat Protection requires careful planning. Below are some high level steps on how to proceed if you plan to start implementing this.
- Start with documenting the current settings (IST), This helps you to identify where you are coming from
- Start with documenting the wanted settings (SOLL)
- Make sure that you have licensed your users for using ATP
- Find a group of user in your organization who can serve as a pilot group, some (unfortunately not all) settings can be applied to a pilot group first before implementing them for your whole organization. Once your pilot group gives its OK, plan to implement the solution for all users.
- Prepare each change carefully, make sure that you include a rollback plan and know how to monitor the change for its expected outcome. Also make sure that you know how to troubleshoot, invest time to fully understand what is going on. And believe me, this can some time.
- Make sure that you update your procedures, for example to make sure that when a new domain is added to your Office 365 environment, that you also include that domain in your defined policies.
- Make sure that you regularly review your settings compared to your baseline, using the ORCA PowerShell script is a great way to do so
- Make sure you regularly review what Microsoft is changing, and determine its impact on your environment.
Conclusion
Even though this has become quite a blogpost (TL;DR;) I still have the feeling that I only touched some of the functionality available in Office 365 Advanced Threat Protection. Consider this a brain dump, where I also realize that I might have missed some important functionality.
I do hope this post can serve as a good starting point if you are planning on implementing this functionality in your environment. Keep in mind though that you must consider Exchange Online Protection to be in-scope as well.
References
Introducing Office 365 Advanced Threat Protection
Office 365 Advanced Threat Protection service description
What is this Microsoft Intelligent Security Graph everybody is talking about?, by Maarten Goet
Best practices for configuring EOP and Office 365 ATP
Recommended settings for EOP and Office 365 ATP security
Use ORCA to Check Office 365 Advanced Threat Protection Settings, by Tony Redmond
Set up Office 365 ATP Safe Links policies
Set up a custom do-not-rewrite URLs list using ATP Safe Links
Schooling A Sea of Phish Part 1: How Office 365 Advanced Threat Protection Helps Stop Spear Phishing
Identify suspicious messages in Outlook.com and Outlook on the web
Is there a way to test the safe attachment function? I know I can use http://www.spamlink.contoso.com to test the safelinks.
Hi Thilo,
There is not an eicar equivalent for this unfortunately. When writing the article I had the same question but couldn’t find a clear answer. There is a UserVoice item for this though, and I just voted: https://office365.uservoice.com/forums/289138-office-365-security-compliance/suggestions/34609375-advanced-threat-protection-safe-attachments-ei
Further I have seen people use a macro in a word document doing something fishy, but those docs don’t work for long if you also have AV software running unfortunately.
During my implementation we eventually decided to use the logging as proof that it was working 🙂 – and luckely we already caught some bad attachments at day one after implementation
If I do find something usefull, I will definitely update my blogpost.
Thanks for visiting my blog!
/Kenneth
Hi Kenneth,
I just tried using a doc calling a powershell, that ist blocked and logged successfully after sending it via in E-Mail. I tried the same doc in Teams, expecting it would be blocked when opening in the webbrowser…but nothing happens. When I download it to Word my defender catches it.
Hi Kenneth,
Microsoft recently introduced “Preset security policies in EOP and Microsoft Defender for Office 365”. These extra policies don’t make the whole ATP configuration simpler. If you look at SafeLinks for example, the preset “Built-in protection” has “Link protection with Safe Links” enabled. Does this mean that you don’t have to create any (extra) Safe Links policy anymore (if you don’t add exclusions to the “Built-in protection” policy) if you want to implement Safe Links to your organization? If this is the case, what should you do if you want to exclude some websites from rewriting? Do you need to create a custom policy in which you configure these sites? And if so, do you have to add (again) all the domains that are included for this custom policy? I feel like there are to many locations where you can/must configure these settings, presets, global, custom. Can you maybe explain the way these presets work together with the settings we already had? Also the Threat Policies have had a major update since your last article (what’s new with Microsoft 😉 ).
Thanks in advance,
Jeroen
Hey Jeroen,
Thanks for your comments, and true the products has changed a lot since writing this article.
For exclusions you indeed have to create a custom policy, while you can enable the feature on the global level.
The presets are a baseline, global settings are global and custom are customizations – sounds obvious but I do agree MS can do a better job making this more clear.
I will make a backlog item, to explain what has changed in the meantime 🙂 Thanks for commenting
/Kenneth